How to Use Bitbucket Pipelines for CI/CD in WordPress and Drupal Web Development
In the world of building websites, it’s important to work fast and without mistakes. Continuous Integration and Continuous Deployment (CI/CD) help make this happen by automating parts of our work. In this post, I’ll demonstrate how to leverage Bitbucket Pipelines for automating various tasks, such as testing and deploying projects built with Drupal and WordPress, two widely used Content Management Systems.
Introduction to Bitbucket and Git
Before exploring the nuances of Bitbucket Pipelines, it’s essential to understand Bitbucket itself. Bitbucket, part of the Atlassian suite, is a web-based version control repository hosting service. It’s widely used for Git repository management, offering both private and public repositories. This feature, especially the availability of private repositories in its free tier, makes Bitbucket a go-to choice for teams and individual developers. It’s not just about code hosting; Bitbucket integrates with other Atlassian products like Jira and Bamboo, creating a seamless ecosystem for software development, from planning to deployment. Git, the backbone of Bitbucket, is a distributed version control system that enables multiple developers to collaborate on the same codebase efficiently.
What is Bitbucket Pipelines?
Imagine a tool that jumps into action the moment you push changes to your remote repository. That’s Bitbucket Pipelines for you. Integrated within your Bitbucket repository, it automates a variety of tasks every time you update your code. These tasks are defined in a configuration file named bitbucket-pipelines.yml. The range of automated steps it can perform includes, but is not limited to:
- Testing Code: Running unit tests, integration tests, and other automated tests to ensure code quality.
- End-to-End Testing: Running E2E tests to simulate real-user scenarios and validate the complete functionality and user experience of the application.
- Deploying Code: Automatically deploying code to different environments like staging or production.
- Building Artifacts: Compiling code or building applications into deployable packages or executables.
- Running Scripts: Executing custom scripts for various purposes, such as database migrations or cleanup tasks.
- Linting and Code Analysis: Checking code for syntax errors, formatting issues, and potential bugs.
- Notifications: Sending notifications or alerts based on the outcome of pipeline steps.
- Docker Operations: Building, running, and pushing Docker images to registries.
- Security Scanning: Performing security scans to identify vulnerabilities in the codebase.
- Documentation Generation: Automatically generating and updating documentation based on code changes.
- Performance Testing: Conducting load and performance tests to assess application behavior under stress.
With these capabilities, Bitbucket Pipelines enhances the efficiency, consistency, and reliability of your software development process.
Setting Up a Repository with Bitbucket Pipelines
1. Create or Select Your Repository
- Step 1: Log in to your Bitbucket account.
- Step 2: Create a new repository or select an existing one where you want to set up Bitbucket Pipelines.
2. Initialize Bitbucket Pipelines
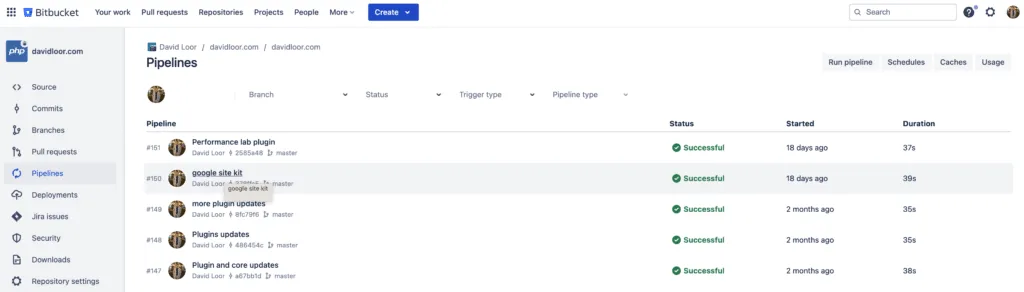
- Step 3: In your repository, navigate to the ‘Pipelines’ section in the left sidebar.
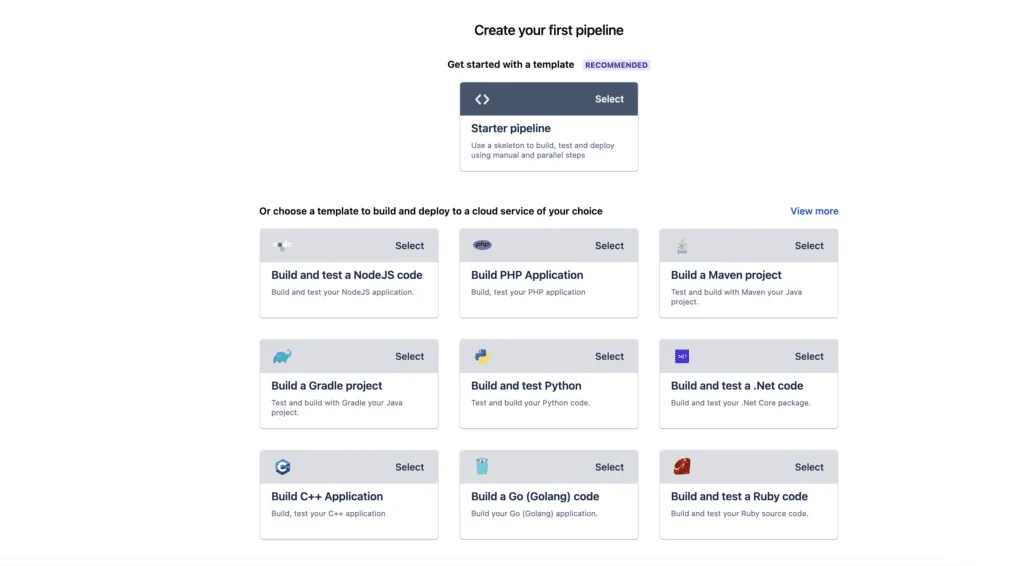
- Step 4: Click on ‘Create your first pipeline’. Bitbucket will display a variety of templates.
- Step 5: Choose a template that best fits your project’s technology stack. For instance, select ‘Build PHP Application’ for a PHP-based project.
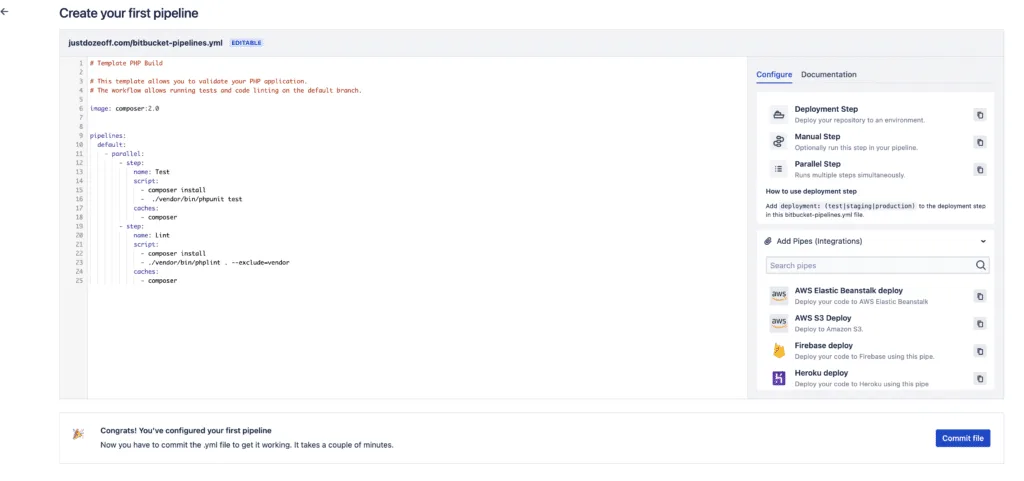
- Step 6: Bitbucket will display the generated
bitbucket-pipelines.ymlfile based on the selected template. Review the pipeline configuration to ensure it aligns with your project’s requirements. This file includes predefined steps for testing and linting your PHP code. - Step 7: You can edit the file directly in the Bitbucket interface to customize the pipeline steps according to your project needs. Make sure to define any additional build, test, or deployment steps that your project requires.
- Step 8: Once you have reviewed and optionally edited the configuration, click ‘Commit file’ to save the
bitbucket-pipelines.ymlfile to your repository.
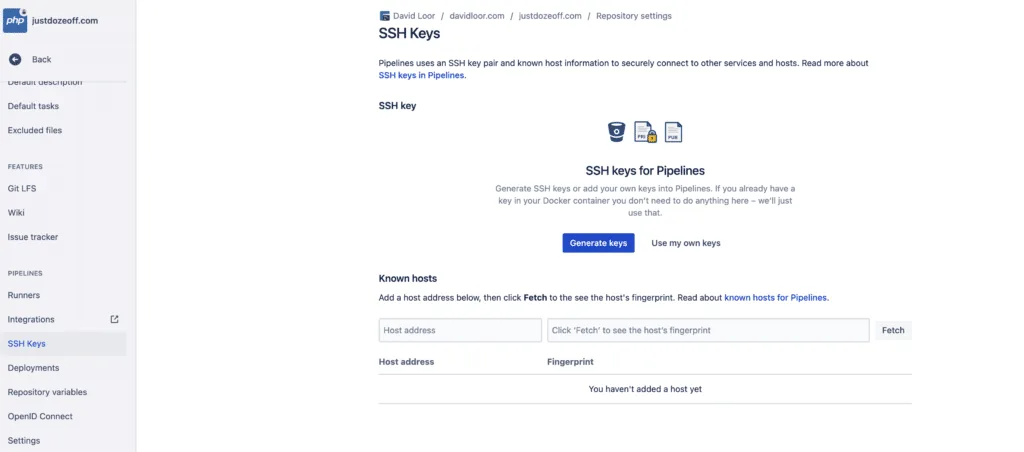
3. Add SSH Key for Server Access (Optional)
- Step 9: Navigate to ‘Repository settings’, then ‘SSH keys’ under ‘Pipelines’ if your deployment process requires SSH access to your server.
- Step 10: Here, you can either generate a new SSH key pair or add an existing one by clicking ‘Use my own keys’.
- Step 11: If you’re adding an existing key, provide the private key in the space given and label it (e.g., ‘Deployment Server’).
- Step 12: For the SSH key to work, you also need to add the server’s host information under ‘Known hosts’. Enter the host address and fetch the host’s fingerprint to ensure secure connections.
- Step 13: Save the SSH key and known host details.
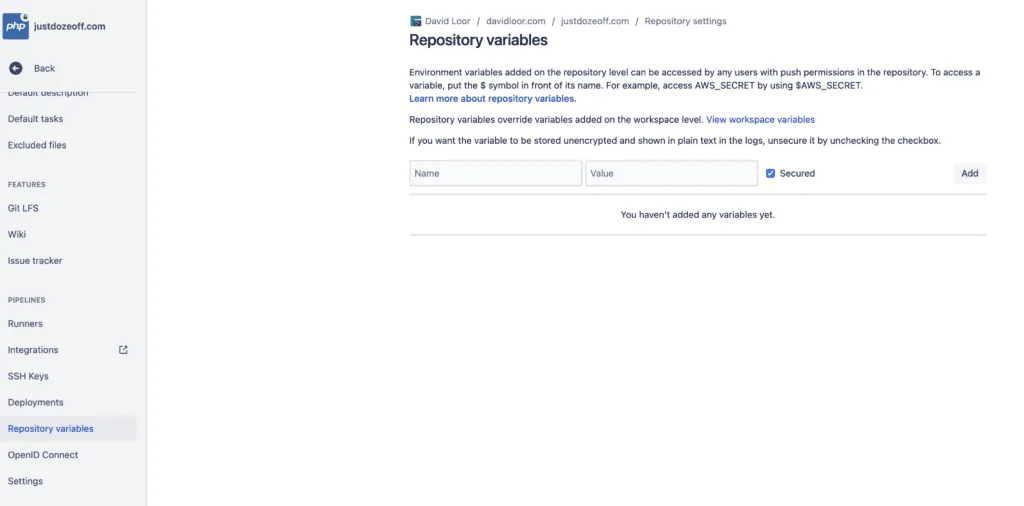
4. Define Repository Variables
- Step 14: Go to ‘Repository settings’ and click on ‘Repository variables’ under ‘Pipelines’.
- Step 15: Click on the ‘Add’ button to create a new variable.
- Step 16: Enter the ‘Name’ for the variable, such as
DEV_SERVER, and the ‘Value’ that corresponds to it. - Step 17: If the variable is sensitive, ensure the ‘Secured’ checkbox is checked to hide the value in logs.
- Step 18: Click ‘Add’ to save the variable.
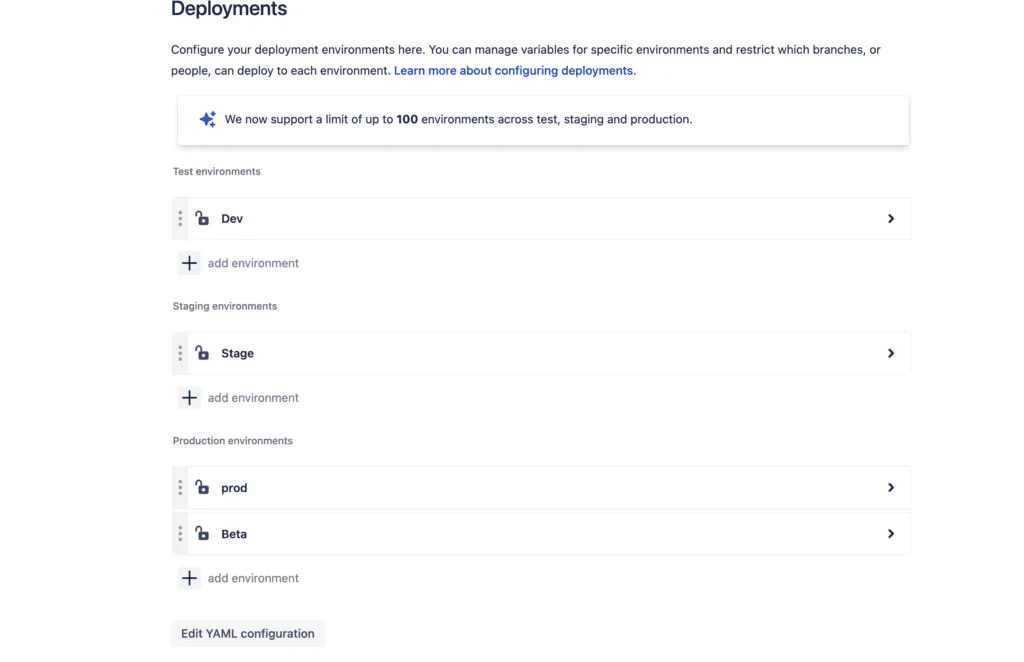
5. Define Deployment Environments
- Step 19: In ‘Repository settings’, navigate to ‘Deployments’ under ‘Pipelines’.
- Step 20: Define your deployment environments. Bitbucket supports up to one hundred deployment environments under the categories:
Test,Staging, andProduction. - Step 21: For each environment, you can specify different configurations. Enter the environment-specific details such as URLs, server paths, or any other relevant data as repository variables, prefixing them with the environment name like
TEST_,STAGE_, andPROD_for clarity. - Step 22: Ensure that any sensitive information for each environment is secured. Bitbucket will mask secured variables in logs and the UI.
6. Finalize Setup
- Step 23: Commit any changes to the
bitbucket-pipelines.ymlfile. - Step 24: Push the changes to your repository to trigger the pipeline.
- Step 25: Utilize
ignorelist.txtin your deployment process. As part of the deployment step, especially when syncing files with rsync, it’s important to manage which files are transferred to the production environment. For this, we use a special file calledignorelist.txt. This file contains a list of all files and directories that should be excluded during the rsync process to prevent overwriting or unnecessary transfer of files.
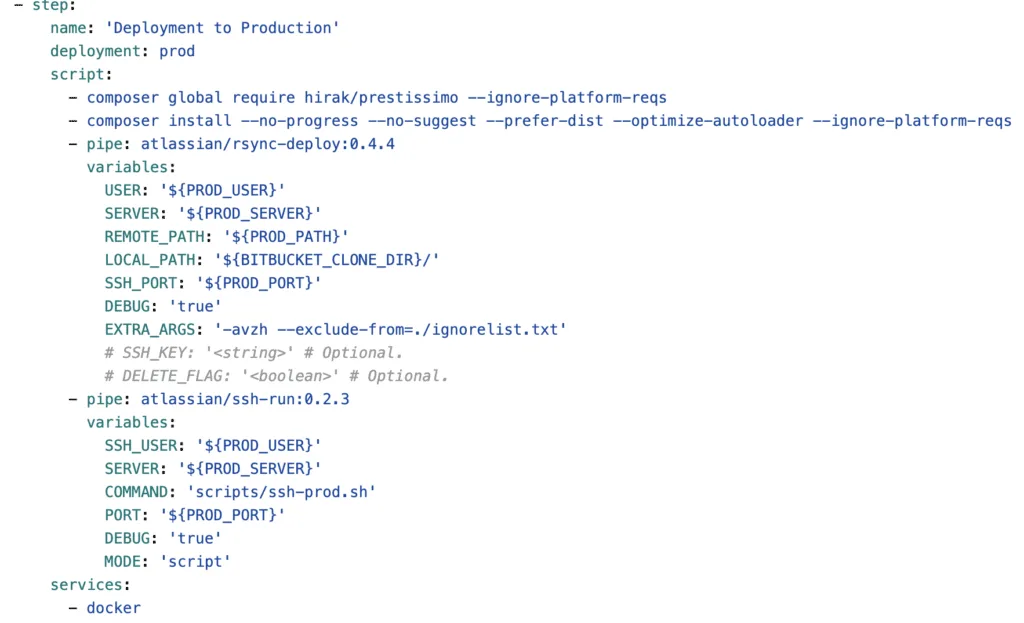
For practical examples of bitbucket-pipelines.yml configurations, visit this repository: Bitbucket Pipelines Examples. Notably, this Drupal-focused example illustrates running composer install in the cloud for Drupal projects. These examples serve as a useful starting point for customizing your own pipelines.
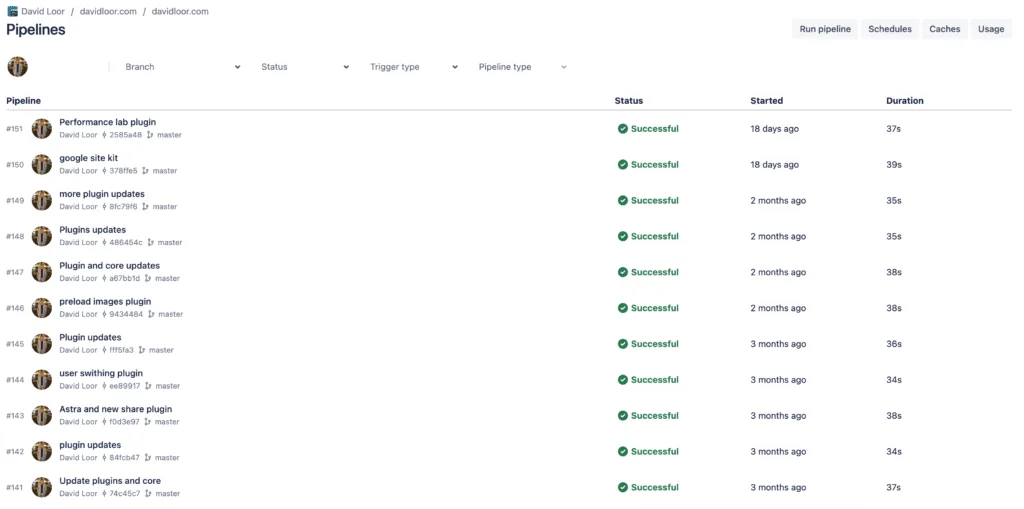
7. Monitor Your Pipeline
Step 26: Check the ‘Pipelines’ section after each push to monitor the execution and view logs.
Final Thoughts
To sum up, Bitbucket Pipelines brings a lot of ease and efficiency to web development. It simplifies teamwork, testing, and deployment, making our work smoother.
Remember, the world of CI/CD is always evolving. What I’ve covered is just the start. As you use Bitbucket Pipelines more, you’ll learn new ways to make it work better for your needs. Keep exploring and improving your development process. Happy debugging!