How to Use SoapUI for Consuming and Testing SOAP Web Services in 6 easy steps
SoapUI is a powerful, user-friendly tool for testing APIs and web services. It is specifically designed to work with SOAP (Simple Object Access Protocol) web services, which are based on XML messaging and use standardized communication protocols for exchanging structured data over the internet. In this tutorial, we'll walk you through using SoapUI to consume SOAP web services for testing and development purposes.
Prerequisites
Before you can use SoapUI, you'll need to download and install the application. Visit the SoapUI website and follow the installation instructions for your system.
Step 1: Create a New SoapUI Project
- Launch SoapUI on your computer.
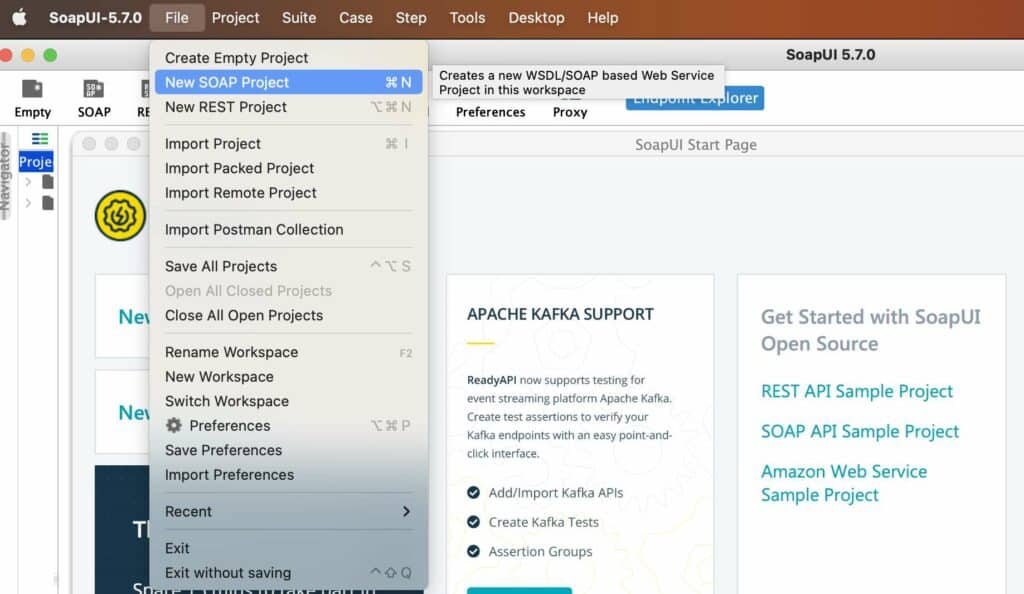
- Click on the
Filemenu and chooseNew Soap Project.

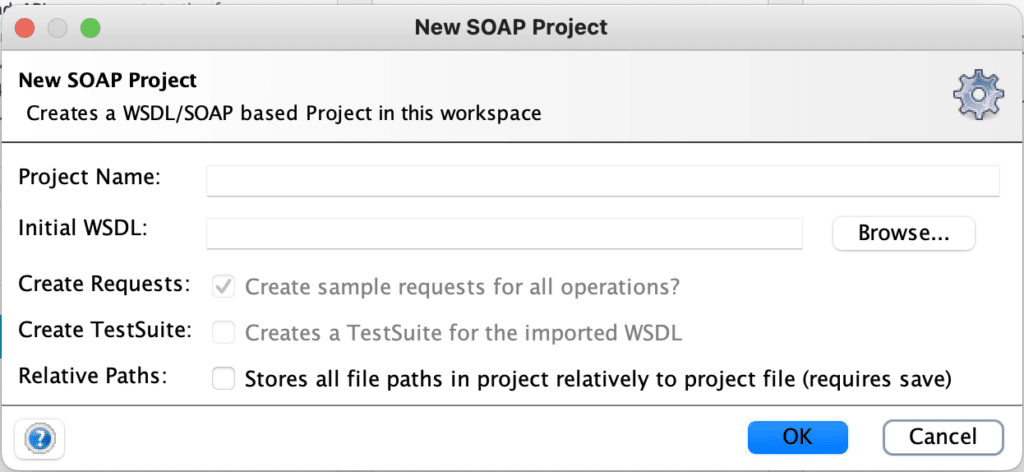
- In the
New Soap Projectdialog, enter a project name and the WSDL URL of the SOAP web service you wish to work with. WSDL (Web Services Description Language) is an XML document that describes the interface of the SOAP web service.

- Click
OKto create your new project.
Step 2: Explore the SOAP Web Service
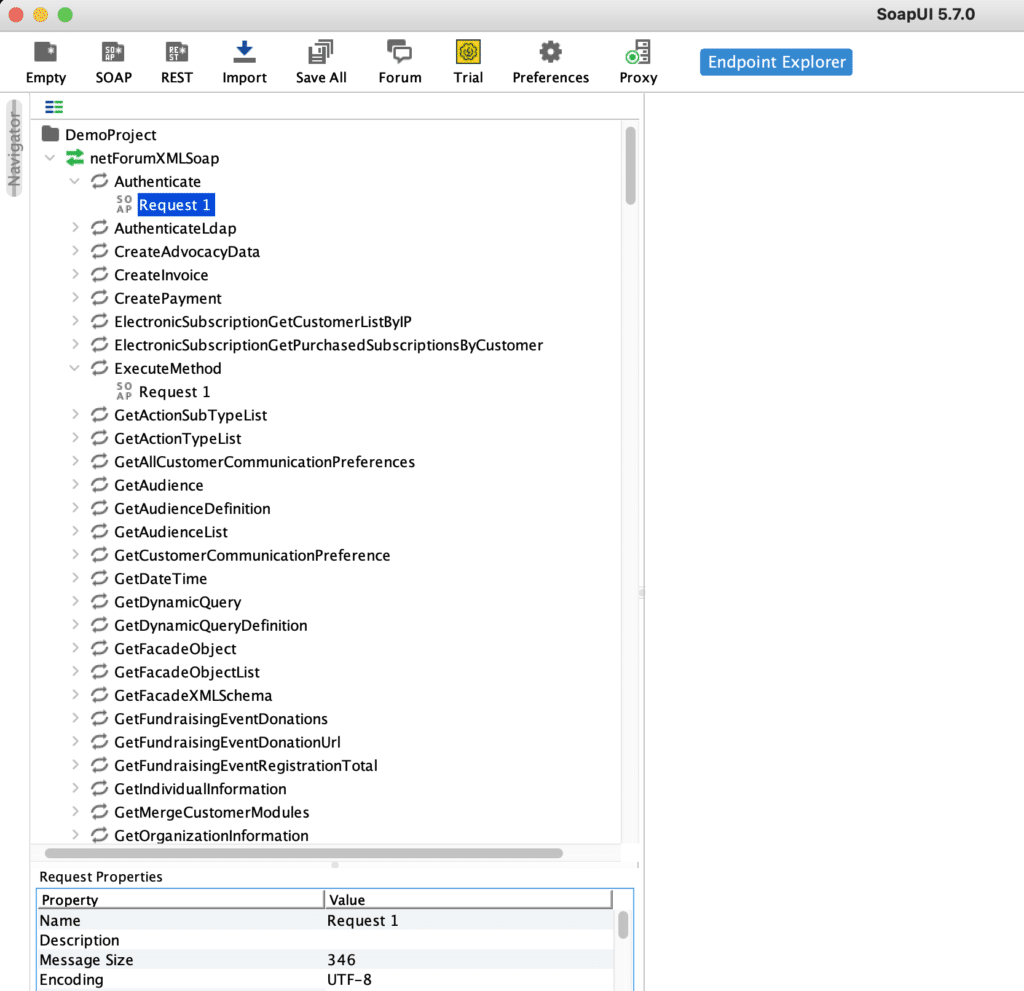
SoapUI will now display the available SOAP web service operations in the left pane. Expand the nodes to see the operations offered by the web service. Each operation usually corresponds to a specific functionality or task.

Step 3: Create a New Request
- Right-click on the desired operation (e.g.,
ExecuteMethod), and chooseNew Request. - A new
Request 1will be created under the chosen operation. Provide a meaningful name for it. - Double-click on the new request to open its editor.
Step 4: Enter Inputs for the Request
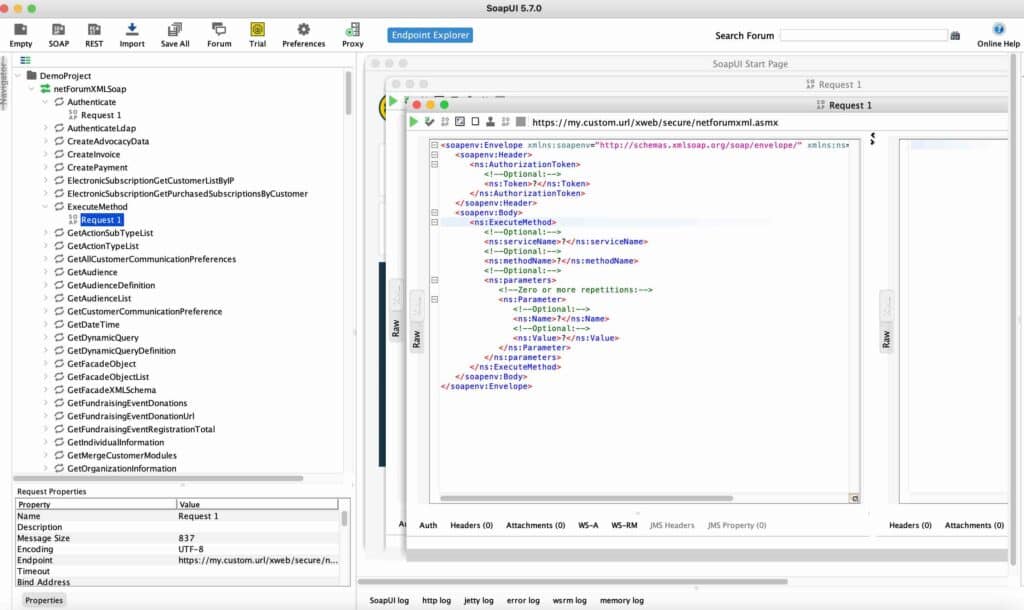
- In the request editor, you'll see an XML message template generated by SoapUI. This template is based on the WSDL definition of the operation.
- Add the required inputs by replacing the
?placeholders in the XML message template with actual values. - You can also modify the headers of the SOAP request if needed. To do this, switch to the
Headerstab and edit the key-value pairs.

Step 5: Send the Request and Inspect the Response
- Click the green
Submitbutton (with the play icon) at the top-left corner of the request editor. - SoapUI will send the request to the SOAP web service and display the server's response in the right pane of the request editor.
- Analyze the response to ensure that the web service functioned as expected. The response is structured as an XML message, similar to the request.
Step 6: Save the Project
Remember to save your project so that you can easily access and edit your requests in the future. Click File > Save Project or press CTRL + S.
Conclusion
By following these steps, you have now learned how to use SoapUI to consume SOAP web services. With this powerful tool, you can test, debug, and explore the functionalities of different SOAP web services. Happy testing!